
This page walks you through using Ghidra to reverse engineer NES ROMs using the Ghidra-Nes-Rom-Decompiler-Plugin. This plugin currently only supports a handful of the most common mappers but it adds up to quite a large number of games supported.
To reverse engineer a NES ROM with Ghidra you need the GhidraNES Plugin, but note that it only currently supports the following mappers so far:
So make sure that your game is in one of those lists before continuing.
So it might look like there is not much mapper support in the list above, but remember not all mappers have been used, and many just for a single game.
It is unlikely your game will be using Mappers: 6,8,12,14,15,17,27-31,35-47,49-63, 74, 81, 83-84, 90-91, 98-104, 106-117, 120-139, 141-143, 145-151, 153, 155-157, 160-179, 181-183, 186-205, 208-209, 211-231, 233-255 as there was no official games released for them (pirate games and multi-carts only).
Notes on a couple of other mappers:
So unless you are looking to reverse engineer Japanese, pirate or a few obscure games, the only mappers that need to be implemented to give access to the majority of the NES library are mappers 3-5 and maybe 205.
Ghidra doesn’t have support out of the box for NES ROM reverse engineering so we need to use a plugin created by ilyakharlamov available here: ilyakharlamov/Ghidra-Nes-Rom-Decompiler-Plugin: Ghidra NES / Famicom ROM Decompiler Plugin
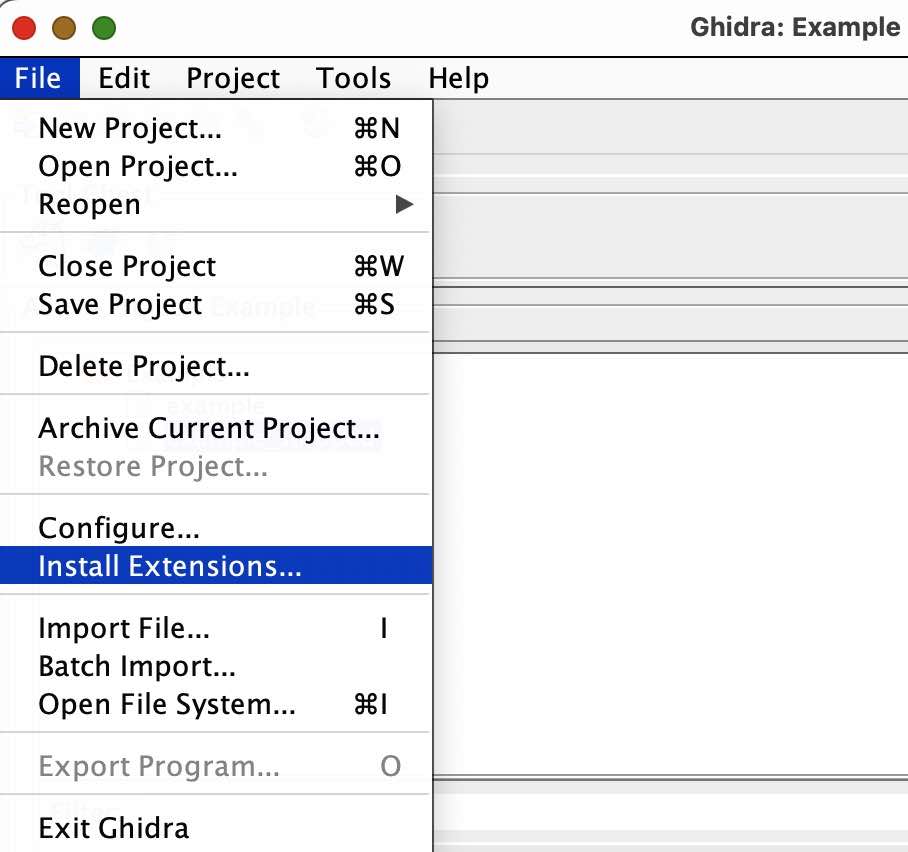
After downloading open up ghidra and go to File -> Install Extensions..
It will then open up the following window, click the green plus icon in the top right:

Then make sure to select the zip file that you downloaded previously:

If you get the following screen then you will either need to build the plugin from source or use an older version of Ghidra:

When attempting to compile the plugin from source and linking the ghidra directory I normally get the error:
JavaModelException: Build path contains duplicate entry: ‘/ghidra_10.2.3_PUBLIC/Ghidra/Processors/68000/lib/68000.jar’for project ‘Ghidra-Nes-Rom-Decompiler-Plugin’
To fix this you need to right Click on the Project and select “Properties”, go to the “Java Build Path” tab and then the Libraries tab and delete all the jars.
When that is done you will be able to run the application in Eclipse by clicking the green play icon and the following window will pop up:

Select “Ghidra” from this window.
If you get an error such as:
Exception in thread “main” ghidra.util.exception.AssertException: Multiple modules collided with same name: Ghidra-Nes-Rom-Decompiler-Plugin
THen you need to delete the Ghidra-Nes-Rom-Decompiler-Plugin folder from the global ghidra config file location e.g ~/.ghidra/Extensions
Now when you go to Import File and select a .nes ROM file you should get the following dialog:

Now after import you should be able to decompile any function you want as long as the Mapper is supported in the NES Plugin (currently only Mapper 0):

Super Mario Bros is an excellent game to use to learn Ghidra and how to reverse NES roms, as there is already documentation and disassembly on the web. So you can practise using Ghidra and use the Mario Bros disassembly here to check your work!
First make sure to open the Super Mario Bros. (World).nes rom (MD5: 811b027eaf99c2def7b933c5208636de) with Ghidra and the GhidraNes plugin as shown in the previous guide.
Now you will notice that it has detected about 36 functions, along with some already named like reset and vblank:
If you start at the top of the Ghidra Disassembly window you can start to name them based on the disassembly file here.
Note that normally you won’t have all the symbol names given to you like this for ROMS that have not yet been disassembled by the community, we are just using this as an example to teach the basics of Ghidra.
Go to the first function at 0x8000 and you will notice it has already been named as “reset”, in the disassembly we are using it was called start so we can rename this to match just for convenience.
To do this select the reset name and Press the L key on the keyboard, this will open a dialog asking for the name type in Start like so:
The reason we know this is called Start is because of the .org $8000 just before the Start label, this means place that function at location 0x8000.
We can now start from the top of the Ghidra Listing and start re-naming the labels to match the disassembly, starting with VBlank1 then VBlank2 etc by pressing L and typing in the name.
You now know how to rename a function/label, which will be used all the time when reverse engineering your own ROMS.
Now you can keep going down and naming until we get to MoveAllSpritesOffscreen where you will notice the community disassembly and the Ghidra auto disassembly listing don’t match:
We can tell this is wrong as Ghidra put a label 1 byte into what it thinks is the BIT instruction (LAB_8222+1) which should not be possible.
The strange thing is that this doesn’t look like valid 6502 assembly, the BIT instruction is normally more than just the opcode (has operands too), but the disassembly just has it as:
.db $2c // Just the opcode for BIT instruction
This could be an optimisation to keep the number of bytes down, if the program comes from the MoveAllSpritesOffscreen label then it will indeed read it as a BIT instruction, however if they go to the MoveSpritesOffscreen (LAB_8222+1) label it will be read as a ldy #$04 instruction.
You can leave this code as it is but if you want it to look like the original disassembly you can use Ghidra features to change it.
You can Right click and select Clear Code Bytes or just press C, this will mark it back to data. Then right click 0x8223 and select Disassemble to see the LDY instruction. In the end it should look like this:
Keep going through the disassembly until after you have named SprInitLoop and you will notice that after the RTS Ghidra just thinks there is data:
However the community disassembly knows this is a label called TitleScreenMode with some assembly code in it.
It is easy to tell Ghidra that this is code in the same way you did above, by right clicking 0x8231 and select Disassemble or just pressing D on the keyboard.
But you will notice that it didn’t auto add a label to this code, because Ghidra has no idea it has been called and where it has been called.
You can give the 0x8231 address a label by pressing L in the same way we have been renaming labels before.
it should now look like this:
Now you will notice that the community disassembly uses the Define Word (.dw) opcodeafter the JSR to join the bytes together into words (2 byte blocks).
We can also do this in Ghidra by right clicking the first byte that you know is actually a Word and select Data -> Word like so:
Now this is where it is useful to know about one of the functions in the disassembly called JumpEngine.
The code is here (copied from the community disassembly):
;-------------------------------------------------------------------------------------
;Memory address 0x04 - address low to jump address
;Memory address 0x05 - address high to jump address
;Memory address 0x06 - jump address low
;Memory address 0x07 - jump address high

JumpEngine:
       asl          ;shift bit from contents of A (Multiply Accumulator by 2 due to 16-bit addressing (2 bytes for an address)
       tay          ; Y = A
       pla          ; pull saved return address from stack into Accumulator
       sta $04      ; Store value of Accumulator at Memory location 0x04
       pla          ; pull saved return address from stack into Accumulator
       sta $05      ; Store value of Accumulator at Memory location 0x05
       iny
       lda ($04),y  ;load pointer from indirect
       sta $06      ;note that if an RTS is performed in next routine
       iny          ;it will return to the execution before the sub
       lda ($04),y  ;that called this routine
       sta $07
       jmp ($06)    ;jump to the address we loaded
This code implements a jump table mechanism using indirect addressing to determine which function to execute based on the contents of the accumulator (A), and perform a jump to that routine.
Now remember all the DW (DefineWord) opcodes we just added, these are the functions that get executed by the JumpEngine function based on the Accumulator (A register).
This means that the 2-Byte Words we are defining are actually locations to functions that get jumped to at runtime.
Ghidra’s static disassembler was not smart enough to pick this up (would require dynamic disassmbler/runtime information). But we can use this information to tell Ghidra about functions it doesn’t know about.
This is why Ghidra only detected about 36 functions by itself, its not because Mario has been implemented in that few functions, it just didn’t have enough information to find them.
You will notice in the community disassembly there are blocks of named data such as WSelectBufferTemplate:
WSelectBufferTemplate:
      .db $04, $20, $73, $01, $00, $00
We can name the first byte with a label like we have done previously, but how do we group these bytes together?
One way is to define them as a Byte Array in Ghidra (Data -> Choose Data Type -> Type in byte[6]. Or by Data -> Create Array and type in 6 elements then choose the data type after.
Which should result in:
After WSelectBufferTemplate You will notice that Ghidra thinks there is just data but the disassembly knows that there should be a function there.
So first at location 0x8245 tell Ghidra to disassemble it as we have done before, and then you will be able to right click the same address and a new option will appear to Create Function.
Call the function GameMenuRoutine like so:
Now it will appear along side all its other friends in the function panel for easy reference.
You will also notice that after marking the bytes as disassemblable, Ghidra has managed to find even more functions by itself (up to 168 now).
At this point you should be able to go through the rest of the file and you can use the following table of keyboard shortcuts to save time:
| Keyboard Key | Purpose |
|---|---|
| F | Create a Function |
| L | Name/Rename a Label or Function |
| D | Disassemble |
| [ | Create an Array |
This exercise will really make you appreciate how big a game disassembly is, how many labels need to be discovered and named.
Bare in mind you need to find out what the code does in the first place to be able to name them!
So its a very time consuming task starting a full disassembly project (never mind a decompilation).
Now I don’t expect you to go throught he whole file and manually add all the functions/labels, there is a much easier way to do that by using some Ghidra scripts that we provide here.
Follow the instructions on that readme to import all the symbols for Super Mario into your Ghidra project.